Category: Operations & SOPs

  • Refurbishment & Grading Standards: SOP for Testing, Cosmetic Grades, Data-Wipe Verification, and Release to Sale

    Refurbishment & Grading Standards: SOP for Testing, Cosmetic Grades, Data-Wipe Verification, and Release to Sale

    Purpose: Provide a clear, audit-ready standard operating procedure (SOP) for refurbishing IT assets, assigning consistent cosmetic and functional grades, verifying data sanitization, and authorizing units for resale or redeployment.
    Applies to: Laptops, desktops, all-in-ones, servers, monitors, mobile devices, and small peripherals in an ITAD/e-waste recycling context aligned with R2v3 and common enterprise expectations.


    1) Roles and responsibilities

    • Refurb Lead: Owns this SOP, updates test matrices, approves deviations.
    • Technician: Executes functional testing, cleaning, minor repairs, grading, and labeling.
    • Data Technician: Performs data wipe and verification; isolates failures.
    • Quality Assurance (QA): Performs sample audits, signs final release, monitors KPIs.
    • Warehouse Coordinator: Maintains chain-of-custody, locations, and pick-ready staging.

    2) Pre-requisites and workspace standards

    • ESD controls: Wrist straps, grounded mats, humidity and temperature within equipment specs.
    • Clean bench: Dust control, compressed air, microfiber cloths, approved cleaning agents only.
    • Tools: Diagnostic USBs, stress-test utilities, battery health tools, pixel checkers, screw kits, thermal paste, barcode labeler.
    • Parts stock: RAM, SSDs/HDDs, power bricks, CMOS batteries, fans, hinges, cables.
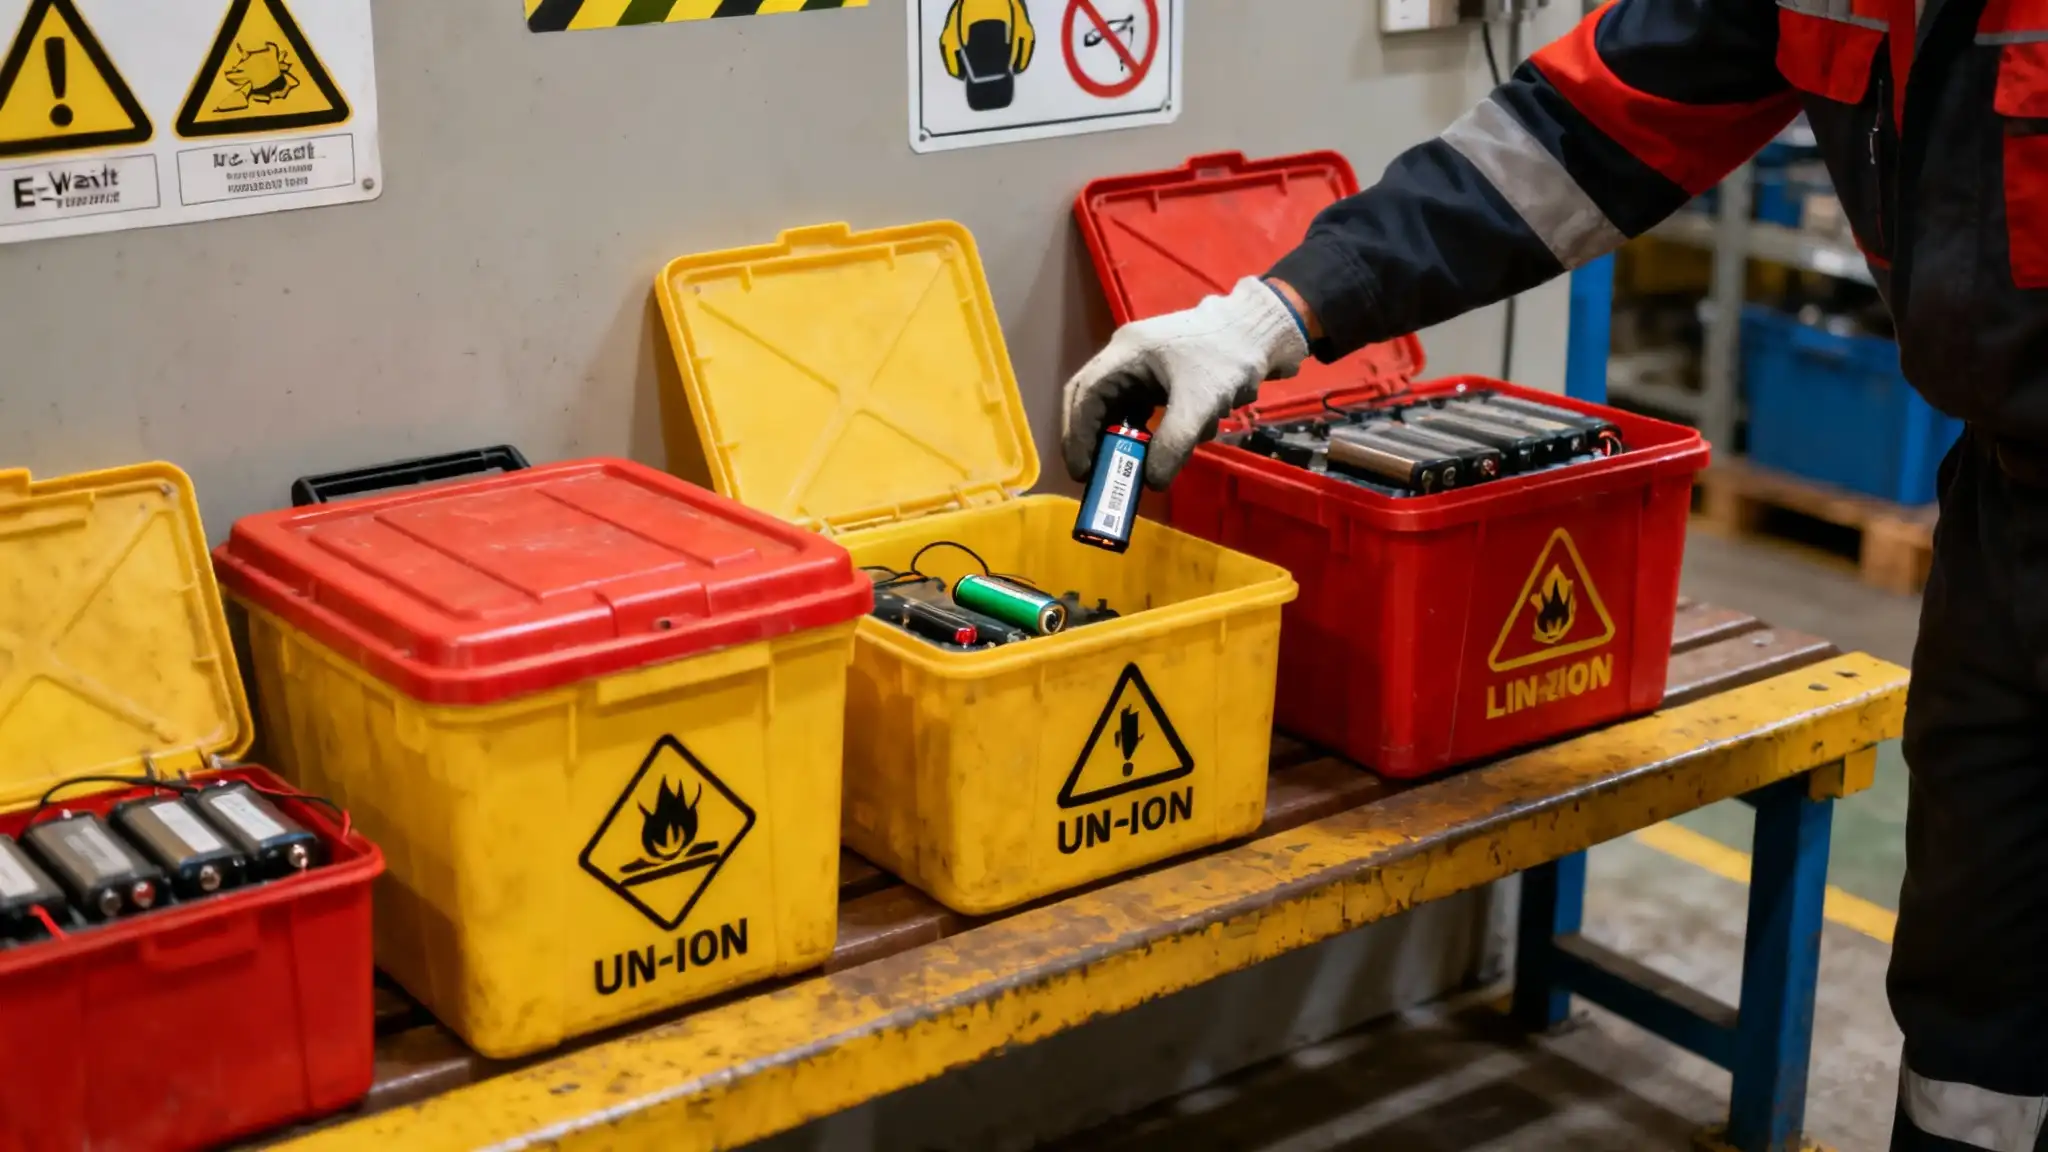
    • Safety: PPE for cleaning chemicals; lockout/tagout for high-voltage monitors; fire-rated containers for suspect batteries.
    • Records: Asset ID labels tied to a device record (make, model, serial, customer lot, intake date, and data classification if provided).

    3) Process overview (high level)

    1. Intake & Triage: Verify asset ID, external condition, power-on eligibility, data classification, and customer instructions.
    2. Data Sanitization: Wipe or destroy per policy. Verify and log results.
    3. Functional Testing: Apply model-specific test matrix. Record pass/fail and repairs performed.
    4. Cosmetic Grading: Assign grade using the rubrics below; capture supporting photos.
    5. Final QC Gate: QA sample-checks function, cosmetics, labeling, and documentation.
    6. Release to Sale: Generate spec label and listing attributes; move to pick-ready location.

    4) Data sanitization & verification (must be completed before functional testing that accesses user data)

    Isolation: Devices with storage media are quarantined in a limited-access area until wiped or storage removed.
    Method selection: Based on storage type and customer policy (e.g., overwrite for HDD, cryptographic erase or overwrite for SSD; physical destruction when required).
    Execution:

    • Confirm the asset ID and media serial match the record.
    • Apply the approved sanitization method with verification enabled.
    • For multi-drive systems (RAID, dual storage), sanitize each device individually.
      Verification:
    • Save a report (or log) with asset ID, storage serial(s), method, date/time, technician ID, and result (success/fail).
    • Random sample audit: QA re-runs verification on at least 5% of wiped units per lot.
      Failures:
    • If wipe fails or verification is incomplete, reattempt once. If still failing, escalate to physical destruction or specialized handling per policy.
      Recordkeeping:
    • Attach the wipe report to the device record.
    • Apply a “Data Cleared” label with date, technician initials, and method.

    5) Functional testing matrices

    Create model-agnostic matrices with minimum pass levels and optional enhancements. Below is a baseline you can adapt.

    5.1 Laptops

    • Power & POST: Boots without error beeps; BIOS accessible; correct CPU and RAM detected.
    • Battery health: Reported design vs. full charge capacity; Grade A ≥ 80%, B 60–79%, C < 60% (or include new battery).
    • Keyboard & input: All keys register; trackpad click and movement consistent.
    • Display: No cracks; brightness uniform; no pressure marks; pixel test (allowable defects per grading rubric).
    • Storage & RAM: SMART check; surface scan or short DST; memory test pass.
    • Ports & wireless: USB, video out, audio, Wi-Fi, Bluetooth verified.
    • Thermals: 15-minute stress test; fans functional; temps within spec.
    • Camera & speakers: Basic mic and speaker test; camera detection.
    • Cosmetic: Apply grading rubric (below); hinge stiffness acceptable.

    5.2 Desktops/All-in-Ones/Servers

    • POST stability: No hardware errors; time/date set; RAID healthy.
    • Storage: SMART/DST pass; SSD life check; confirm bays populated as listed.
    • Thermals & noise: 20-minute stress test; no abnormal bearing noise.
    • I/O: USB, NIC(s), display outputs, audio; add-on cards recognized.
    • Power supply: Voltage rails within tolerance under load (software or hardware tester).
    • Cosmetic: Chassis straight, no deep bends; bezels intact; grills unobstructed.

    5.3 Monitors

    • Panel: No cracks; brightness uniformity acceptable; color shift within tolerance; pixel defect count per grade.
    • OSD & ports: Buttons work; HDMI/DP tested; stand adjustments functional.
    • Backlight hours: If available, record to inform grade/price.
    • Power supply: Internal or external brick verified.

    5.4 Mobile devices (phones/tablets)

    • Activation lock: Confirm off.
    • Screen & touch: Multi-touch test; glass integrity; no image retention.
    • Battery health: Report percentage if available; fast charge check.
    • Buttons & sensors: Power/volume, cameras, mic, speakers, vibration, proximity sensor, Wi-Fi, Bluetooth, cellular.
    • Storage health: Basic read/write test; no i/o errors.

    Documentation: Every test step records Pass/Fail, technician initials, date, and notes on repairs (parts used, times).


    6) Cosmetic grading rubric (A/B/C/D)

    Use consistent, objective criteria and require photos for B- and C-grade units. If in doubt, grade down.

    Grade A (Excellent)

    • Housings: No dents or cracks. Hairline scratches only; < 3 light marks not visible beyond 30 cm.
    • Displays: No cracks, chips, bright spots, pressure marks, or deep scratches. Pixels: 0 bright; ≤ 2 dark subpixels allowed if not clustered.
    • Keyboards/trackpads: Minimal wear; legends fully visible; no shine on > 10% of keys.
    • Batteries: Laptops ≥ 80% design capacity; mobiles ≥ vendor “good” threshold.
    • Monitors: Stand fully functional; no discolorations; backlight uniform.

    Grade B (Good)

    • Housings: Minor scuffs/scratches visible at 30 cm; 1 small ding (< 3 mm) acceptable; no cracks affecting structure.
    • Displays: Up to 1 minor pressure mark or hairline scratch not visible on white screen at 30 cm; Pixels: ≤ 3 total defects; no clusters.
    • Keyboards/trackpads: Moderate cosmetic wear; all legends legible; function normal.
    • Batteries: Laptops 60–79% design capacity.
    • Monitors: Minor bezel wear; ≤ 2 small dust spots not visible in normal use.

    Grade C (Fair/Functional)

    • Housings: Noticeable wear, multiple scuffs, or up to 2 small dings; no sharp edges or exposed internals.
    • Displays: Noticeable scratch or pressure mark visible in bright screens but not obstructing primary content; Pixels: ≤ 5 defects; minor image retention allowed.
    • Keyboards/trackpads: Heavy wear but functional; replacement caps allowed if consistent.
    • Batteries: < 60% capacity or holding charge but below B threshold.
    • Monitors: Noticeable wear; limited uniformity issues; stand may have 1 function missing if VESA mount provided.

    Grade D (Parts/Repair)

    • Cracks, missing plastics, dead pixels in clusters, severe pressure marks, faulty ports, failed thermal tests, activation lock present, or battery unsafe. Not for resale until repaired and re-graded; else route to parts or recycling per policy.

    Photo evidence:

    • 3 angles minimum (front, back, side/hinge).
    • Close-ups for any B/C-defining blemishes with a scale reference (coin or ruler).
    • Save filenames with Asset ID and grade.

    7) Repairs and replacements

    • Approved repairs: RAM/SSD upgrades, keyboard/trackpad swaps, fan/heatsink service, screen replacements, hinges, rubber feet, CMOS batteries, power bricks.
    • Non-approved repairs: Board-level rework unless by certified tech in ESD area; cosmetic filling/painting that may hide damage; unsafe battery manipulation.
    • Parts traceability: Record part number, condition (new/pulled/refurb), supplier, and technician.
    • Re-test: After any repair, repeat affected functional tests before grading.

    8) Labeling & documentation

    Each asset must carry:

    • Front label: Make/Model, CPU, RAM, Storage, Screen size/resolution, GPU (if any), Wi-Fi, OS license indicator (if applicable), Battery health (laptops/mobiles), Grade, and Asset ID (barcode).
    • Media label: “Data Cleared” with method, date, initials; or “No Storage.”
    • Box label (if kitted): Asset ID(s), quantity, grade mix, gross weight, pick location.

    Device record must include: Intake details, customer lot, serial(s), wipe report, functional test results, repairs, cosmetic grade with photos, QA result, and final disposition.


    9) Final QA gate and release to sale

    Sampling: QA reviews at least 10% of ready units per lot (increase to 100% for new technicians or high defect rates).
    Checks:

    • Data wipe documentation present and matches asset.
    • Functional test sheet complete; spot-check critical items (display, storage health, ports).
    • Cosmetic grade matches photos and rubric; no misrepresented defects.
    • Labels accurate; barcode scannable; accessories correct (power adapters, stands).
      Disposition:
    • Pass: QA signs off; asset is moved to “Pick-Ready.”
    • Fail: Return to technician with reason. Log corrective action. Re-audit fails weekly to identify trends.

    10) KPIs and quality thresholds

    • First-pass yield (FPY): Target ≥ 92% for tested units.
    • Return rate (DOA within 30 days): Target ≤ 2%.
    • Grading accuracy (QA disagreements): ≤ 3% variance between Tech and QA.
    • Sanitization compliance: 100% with verifiable logs; 0 critical deviations.
    • Cycle time: Intake to pick-ready median hours by asset class; set realistic goals and publish weekly.
    • Battery upgrade attach rate: Percentage of laptops below B threshold upgraded before sale (track margin impact).

    11) Common pitfalls and how to prevent them

    • Inconsistent battery health readings: Standardize on one tool and one methodology (full charge, health query, cooldown). Add the reading to labels.
    • Pixel defect disputes: Enforce the numeric thresholds per grade; always include photo evidence with a pixel-test background.
    • Hidden defects in hinges/stands: Add a mandatory “open/close 10x” step for laptops and “tilt/height pivot” for monitors.
    • Thermal throttling missed: Require a short stress test with temperature logging for every CPU-based device.
    • Sanitization log mismatches: Barcode-scan asset and drive serials into the wipe tool; avoid manual entry when possible.
    • Accessories mismatch: Kitting checklist at boxing; weigh boxes to flag missing bricks or stands.

    12) Records and retention

    Maintain the following for the retention period in your compliance program:

    • Device records (intake → disposition) including wipe reports, test results, photos, labels, and QA sign-off.
    • Repair parts traceability logs.
    • Nonconformity and corrective action logs.
    • KPI dashboards and weekly QA sampling sheets.
    • Technician training and authorization matrix.

    13) Release-to-sale checklist (technician + QA sign-off)

    1. Data sanitization: method, report, and label present.
    2. Functional tests: all required steps passed; re-test after repairs done.
    3. Cosmetic grade assigned per rubric; photos captured for B/C.
    4. Battery health captured on label (if applicable).
    5. Labels: spec + barcode + grade + asset ID; box label if kitted.
    6. Accessories matched; power output verified.
    7. QA sample audit completed and signed.
    8. Inventory location updated to “Pick-Ready.”

    14) Continuous improvement

    • Review KPIs weekly; if FPY drops or QA disagreements rise, retrain on the most-missed steps.
    • Update the grading photo gallery with examples so new techs calibrate faster.
    • Refresh test matrices quarterly to reflect new common models, firmware changes, and failure patterns.
    • Invite feedback from sales and returns teams to tune grading thresholds and descriptions.

    Summary

    This SOP gives technicians and auditors the same thing they want: repeatable processes, objective grades, and verifiable records. By sequencing sanitization → testing → cosmetic grading → QA → release, and documenting each step with reports, photos, and labels, you reduce nonconformities, returns, and disputes—while speeding time to sale and protecting data at every stage.

  • Incidents, Nonconformities & CAPA: A Practical SOP for Reporting, Root Cause, and Preventive Actions

    Incidents, Nonconformities & CAPA: A Practical SOP for Reporting, Root Cause, and Preventive Actions

    Purpose: Provide a clear, repeatable system to capture incidents and nonconformities, analyze root causes, implement corrective and preventive actions (CAPA), and prove effectiveness to auditors.
    Applies to: All personnel, contractors, and visitors on site.
    Outcomes: Faster containment, fewer repeat issues, stronger audit evidence, safer operations.


    1) Definitions (plain-English)

    • Incident: Any unplanned event that affects safety, environment, security, or operations (e.g., battery smoke, chemical spill, near-miss, injury, data-wipe station outage).
    • Nonconformity (NC): A failure to meet a requirement—internal SOP, customer requirement, certification clause, legal requirement, or contract. Includes documentation gaps (e.g., missing signature on log).
    • Containment: Immediate actions to control or mitigate the impact (e.g., isolate affected pallets, stop shipment, place hold tags).
    • Corrective Action (CA): Action to eliminate the root cause of a detected nonconformity to prevent recurrence.
    • Preventive Action (PA): Action to eliminate the cause of a potential nonconformity to prevent occurrence (proactive).
    • Verification of Effectiveness (VoE): Evidence that the action worked over time (e.g., trend data shows reduction, sample audits pass for 90 days).

    2) Roles & Responsibilities

    • All Employees: Stop unsafe work, report incidents/NCs immediately, assist with containment, record facts.
    • Area Supervisor: Open the report, classify severity, lead containment, assign temporary controls, notify the CAPA Owner.
    • CAPA Owner (often QA/EHS/Operations Lead): Drive root-cause analysis, set actions, deadlines, and metrics; track completion; verify effectiveness.
    • EHS Lead (if safety/environmental): Oversee legal reporting, medical response, spill kits, waste handling, and training.
    • Quality Manager: Maintains CAPA log, trends KPIs, escalates overdue items, prepares audit evidence.
    • Senior Management: Review monthly CAPA dashboard, approve major corrective/preventive actions, remove barriers.

    3) Reporting & Intake (how to capture the issue)

    When to report: Immediately for incidents; by end of shift for minor NCs.
    How to report: Use a single Incident/NC Report Form (paper or digital). Keep reporting simple and non-punitive.

    Minimum fields to capture

    1. Date/time and location (station/line/zone).
    2. Reporter name + contact.
    3. Type: Incident / Near-miss / Nonconformity (minor/major).
    4. Description (facts only; what was observed, not opinions).
    5. Assets/materials involved (IDs, batch, serials).
    6. Immediate actions taken (containment/first aid/shutdown).
    7. Photos or attachments (if applicable).
    8. Initial severity (S1–S4; see below).
    9. Supervisor notified (name/time).
    10. Temporary hold/isolation tag numbers.

    Severity classification (for prioritization)

    • S4 Critical: Injury requiring hospitalization, fire, major spill, data breach, illegal shipment, repeated failure affecting customers/regulators.
    • S3 Major: Medical treatment beyond first aid, equipment damage, batch scrap, shipment recall risk, repeated log gaps.
    • S2 Moderate: First aid case, isolated process deviation, small contained spill, single log defect without impact.
    • S1 Minor: Cosmetic/documentation detail, readily corrected on the spot, no safety/quality impact.

    Escalation timing

    • S4: Notify CAPA Owner and senior management immediately.
    • S3: Notify CAPA Owner within 2 hours, management by end of day.
    • S2/S1: Log within shift; supervisor review within 24 hours.

    4) Containment (stop the bleeding)

    Perform before analysis to prevent spread/recurrence while you investigate.

    Standard containment toolkit

    • Quarantine/hold: Red “HOLD” tags; move items to a designated hold area.
    • Stop & check: Halt affected line; initiate 100% check on last good lot.
    • Administrative controls: Temporary sign-offs, additional checks each hour.
    • PPE/safety: Spill kit deployment, ventilation, isolation of power, fire watch if battery thermal risk occurred.
    • Communication: Post a brief shift note and toolbox talk next day for awareness.

    Record: what was contained, by whom, when, and scope (lot numbers, quantities).


    5) Root Cause Analysis (RCA) that actually works

    Use structured, quick-to-execute methods. Pick one:

    A) 5-Whys (fast)

    1. Why did the event happen?
    2. Why was that possible?
    3. Why did the enabling condition exist?
    4. Why wasn’t it detected/prevented?
    5. Why is the system designed that way?
      Stop when you land on a controllable system cause (not “human error”).

    B) Fishbone (Ishikawa) for complex issues
    Consider People, Process, Equipment, Materials, Environment, Measurement. Brainstorm causes in each branch, then test the most plausible with data.

    C) Evidence checklist

    • Interviews with operators/supervisors (use neutral, non-blaming questions).
    • Review recent changes (new staff, new supplier, revised SOP).
    • Check records (training logs, maintenance, calibration, DDQ approvals).
    • Sampling/inspection of affected stock.
    • Time series or control charts if you track process metrics.

    Avoid blame. “Operator forgot” is rarely the root cause; look for missing visual controls, unclear SOP steps, insufficient training, or poor workstation design.


    6) Corrective & Preventive Actions (how to fix and future-proof)

    Convert root causes into specific, testable actions. Use the Action Definition Rule: One action = one owner = one due date = one measurable outcome.

    Common corrective actions

    • SOP update with clearer steps, photos, and acceptance criteria.
    • Retraining + competency check (quiz or observed demo).
    • Tooling or fixture change; poka-yoke/physical guide to prevent mis-assembly.
    • Additional inspection step with sampling plan for the next 30–90 days.
    • Supplier corrective action (when vendor cause is confirmed).
    • Software/label template change to remove ambiguous fields or enforce required ones.
    • Maintenance/calibration schedule update.

    Preventive actions (proactive)

    • Risk assessment (FMEA-lite) on similar lines or product families.
    • Addons to checklists (e.g., battery intake checklist adds state-of-charge check).
    • Visual management (color coding, floor markings, signage).
    • Change request process to evaluate impacts before implementation.
    • Internal audit focus on the new/changed process next cycle.

    Action prioritization matrix (Impact vs. Effort)

    • Quick wins: low effort, high impact—do immediately.
    • Projects: high impact, high effort—assign project owner and timeline.
    • Fillers: low impact—batch into periodic improvements.
    • Avoid: high effort, low impact—justify only if required.

    7) Documentation & Records (what auditors expect)

    Maintain a single CAPA Log and a case file for each record.

    CAPA Log (master)

    • Unique ID, date opened, type (incident/NC), severity, area.
    • Short description, containment done (Y/N, date).
    • Root cause summary.
    • Action list (owner/due date/status).
    • Verification of effectiveness plan & date.
    • Date closed, management sign-off.
    • Trend tags (battery, data wipe, downstream vendor, EHS, documentation).

    Case File (per CAPA)

    • Incident/NC report, photos, interviews.
    • RCA notes (5-Whys/fishbone).
    • Updated SOPs/checklists (redline + final).
    • Training records for affected staff (attendance + competency).
    • Inspection results or sampling data (before/after).
    • VoE evidence (metrics, audit results).
    • Closure approval.

    Retention: Keep for minimum 3 years (or per your certification/legal requirement); serious cases (S4) for 5+ years.


    8) Verification of Effectiveness (prove it worked)

    Plan VoE before you close the CAPA.

    Typical VoE methods

    • Trend analysis: e.g., zero repeats for 90 days; defect rate below control limit for 3 months.
    • Targeted internal audit: sample the changed process; zero major findings.
    • Sampling: inspect 30 consecutive lots with 0 critical defects and ≤ defined minors.
    • Field feedback: no related customer complaints for the defined period.

    Define success criteria upfront (e.g., “< 0.5% log errors for 12 weeks”), gather data, and attach graphs/screenshots to the case file.


    9) Timeframes & Escalation (keep momentum)

    • Open report: same day (S4/S3); within 24 hours (S2/S1).
    • Containment: immediate for S4/S3; within 24 hours for S2; within 48 hours for S1.
    • RCA start: within 2 business days (S4/S3); within 5 days (S2/S1).
    • Actions due: 14 days (S4), 30 days (S3), 45 days (S2), 60 days (S1) unless justified.
    • Overdue escalation: CAPA Owner → Quality Manager → Plant Manager in weekly review.
    • Closure: after VoE evidence meets success criteria.

    10) Integration with Training & Change Control

    • Training: Any SOP change triggers a targeted training event; record attendance and competency (short quiz or observed task).
    • Change Control: Major corrective actions that alter equipment, software, or layout require a documented change request and, where applicable, risk review prior to implementation.
    • Communication: Post concise “What changed & why” notes on the work area board; include photos of new steps/labels.

    11) KPIs & Dashboard (what to track monthly)

    • # of Incidents / Near-misses / NCs (by area and severity).
    • Average days to containment and to closure.
    • % CAPAs on time (by severity).
    • Top 5 root causes (trend quarter over quarter).
    • Repeat rate for the same NC category.
    • Training effectiveness (post-change audit pass rate).
    • Supplier-related NCs (by vendor, action status).

    Use a simple stacked bar for counts and a line for closure time. Highlight overdue S3/S4 items in red on the management review.


    12) Example, End-to-End (makes it real)

    Event: Drive-wipe station produced 7 drives without verification logs for 2 hours (S3 Major).
    Containment: Quarantine all 42 drives from that period; stop station; assign temporary manual verification step.
    RCA:

    • 5-Whys reveals a new label template removed the “Verified by” required field; operator proceeded without prompt.
    • Measurement branch shows the verification script didn’t block completion on missing signature.
      Corrective actions:
    1. Reinstate required field with a hard stop in software (Owner: IT; Due: 3 days).
    2. Update SOP with screenshot of correct label; add “verify & sign” checklist step (Owner: QA; Due: 5 days).
    3. Retrain all data-wipe operators; competency sign-off (Owner: Supervisor; Due: 7 days).
    4. 100% audit of quarantined drives; re-wipe and relabel where needed (Owner: Ops; Due: 2 days).
      Preventive actions:
    5. Add change-control checklist for any template/software change impacting required fields (Owner: Quality; Due: 10 days).
      VoE plan: 8-week sampling—daily random check of 20 drives; target 0 missing verification signatures.
      Closure: After 8 weeks of zero misses and a passed internal audit, CAPA closed with management sign-off.

    13) Audit Readiness Tips (make your file audit-proof)

    • Use consistent IDs on reports, hold tags, action items, and training events to show linkage.
    • Put a summary sheet on top of each case file: timeline + key decisions + VoE results.
    • Redline SOPs to show exactly what changed; keep both before/after.
    • Keep meeting minutes for management reviews where CAPAs were discussed (bullet decisions and owner/dates).
    • Ensure frontline staff can explain what changed and where to find the checklist.

    14) SOP—Condensed Procedure (copy into your document)

    1. Report & Log: Employee reports; supervisor logs Incident/NC within shift.
    2. Classify & Escalate: Assign severity; notify per matrix.
    3. Contain: Quarantine/stop line; temporary controls; document.
    4. Assign CAPA Owner: Quality/EHS/Operations lead.
    5. RCA: Complete within defined timeframe using 5-Whys or fishbone; gather evidence.
    6. Plan Actions: Define corrective/preventive actions with owners, due dates, and success metrics.
    7. Implement & Train: Update SOPs, train affected staff, update change control if needed.
    8. Verify Effectiveness: Monitor metrics/audits; record VoE.
    9. Close & Review: Management sign-off; capture lessons learned; update risk registers if applicable.
    10. Trend & Improve: Monthly KPI review; reprioritize systemic fixes.

    15) Forms & Templates (fields you can replicate)

    A) Incident/Nonconformity Report

    • ID, date/time, area, reporter, type, severity, description, assets/batches, immediate actions, photos, supervisor notified, signatures.

    B) CAPA Action Plan

    • CAPA ID, RCA summary, actions (owner, due date, status), resources needed, training required, affected documents.

    C) Verification of Effectiveness Log

    • CAPA ID, metric, target, data source, sampling frequency, results, pass/fail, date closed, approver.

    Final Notes

    Keep the process simple, fast, and non-punitive so people report issues early. Tie every action to a measurable result and verify over time. When auditors arrive, a clean log, clear files, and confident operators are the best proof your CAPA system works.

  • Safe Battery & Hazardous Fractions Handling: SOP for Li-ion, CRT Glass, Mercury Lamps, and More

    Safe Battery & Hazardous Fractions Handling: SOP for Li-ion, CRT Glass, Mercury Lamps, and More

    Purpose: This Standard Operating Procedure (SOP) defines how an e-waste or ITAD facility safely receives, triages, stores, and ships hazardous fractions—especially lithium-ion batteries, CRT glass, and mercury-containing lamps—to minimize fire, exposure, and environmental risk while maintaining audit-ready records.

    Scope: Applies to all staff handling inbound equipment and parts, including receiving, triage, refurbishment, demanufacturing, storage, and shipping. Covers small and large format batteries, lead-acid, NiCd/NiMH, CRT devices and cullet, fluorescent/CFL/UV lamps, and incidental spill/breakage response.


    1) Roles, Training, and Competency

    • EHS Lead: owns this SOP, conducts hazard assessments, approves PPE, and reviews incidents/CAPAs.
    • Receiving/Triage Techs: identify hazardous fractions on arrival, apply segregation rules, complete logs.
    • Demanufacturing Techs: remove batteries, lamps, and CRTs per procedure; bag/tag and stage for storage.
    • Warehouse/Logistics: maintain storage limits, aisle spacing, labels, and compliant outbound packaging.
    • All Staff: complete initial training and annual refreshers on battery risks, mercury response, and glass handling.

    Training checklist (retain sign-in sheets):

    • Hazard recognition: swollen/damaged batteries, broken lamps, CRT evacuation hazards.
    • Fire safety and thermal runaway basics; extinguisher selection and locations.
    • Spill/breakage response and notification tree.
    • Proper use of PPE and inspection of gloves/respirators/eye protection.
    • Recordkeeping: what to log, how, and where.

    2) PPE & Work Area Controls (Quick Matrix)

    • Li-ion battery handling: cut-resistant gloves, safety glasses/face shield for damaged units, antistatic sleeve/bag, non-conductive tools, fire-resistant container with inert fill for quarantine.
    • Lead-acid/NiCd/NiMH: chemical-resistant gloves (nitrile), safety glasses, apron for wet batteries; neutralizer and absorbent within 10 m.
    • CRT removal/cullet: cut-resistant gloves, long sleeves, safety glasses + face shield, HEPA vac available.
    • Mercury lamps: cut-resistant gloves, safety glasses; if breakage cleanup, add disposable coveralls and P100 respirator per exposure assessment.

    Area controls

    • No smoking or open flames.
    • Charging only at designated, supervised stations (never in storage areas).
    • Keep Class ABC extinguishers readily available; keep water or water-mist for cooling Li-ion incidents; maintain sand/inert absorbent for containment.
    • Post “No Pallet Jacks” signs where glass/lamps are stored if floor vibration risks tipping.

    3) Receiving & Triage (All Streams)

    1. Visual screen at dock
      • Look for swollen, hot, hissing, or leaking batteries; wet lead-acid; crushed CRTs; broken lamps.
      • Use an IR thermometer for suspicious packs; if > 60°C (140°F), treat as thermal risk and move to outdoor or isolated quarantine immediately.
    2. Immediate isolation
      • Damaged/defective/dangerous (DDD) batteries → Battery Quarantine Bin with inert material (vermiculite or sand), lid on, labeled “Damaged Li-ion—Do Not Charge.”
      • Broken CRT or lamp → secure area, prevent tracking, begin breakage procedure.
    3. Identification & labeling
      • Apply hazard label, date, stream (Li-ion, L/A, NiCd, CRT, Mercury), condition (Intact / Damaged), and weight or count.
      • Record in Hazardous Fractions Intake Log before moving to storage.
    4. Segregation
      • Separate by chemistry (Li-ion vs L/A vs NiCd/NiMH).
      • Keep intact away from damaged.
      • CRT devices separate from lamps and batteries.
      • Maintain minimum 1 m clearance between battery stacks and any ignition sources.

    4) Lithium-Ion Batteries (Primary Fire Risk)

    Key risks: internal short leading to thermal runaway; re-triggering after initial cooling; electrical short from terminals contacting metal.

    Do / Don’t basics

    • Do tape or cap terminals; use non-conductive containers; keep SoC low; cool overheated packs.
    • Don’t crush, puncture, or charge unknown packs; don’t mix damaged with intact; don’t use metal bins.

    Removal & Preparation

    • Depower devices; wait 5 minutes before removal.
    • Use non-conductive tools; remove batteries gently.
    • Tape all exposed terminals; for multi-cell packs, insulate harness connectors.

    Storage

    • Intact Li-ion: rigid, non-conductive containers with lids; layers separated by cardboard; terminal-taped.
    • Damaged/Swollen: place individually in fire-resistant container with inert fill; lid closed.
    • Limits: set conservative max per zone (e.g., ≤ 300 kg intact per bay; ≤ 30 kg damaged in quarantine). Document your facility’s limits and keep a tally.

    Charging policy

    • Charging is prohibited unless you run a controlled test area with fire detection, 24/7 monitoring, non-combustible surrounds, and immediate access to suppression and evacuation routes. Never charge suspect packs.

    Thermal incident response (small device battery)

    1. Alert nearby staff; pull alarm if escalating.
    2. Do not smother with Class D agent for Li-ion; cool generously with water or water-mist to stop propagation and cool adjacent packs.
    3. Keep cooling until steam/smoke stops and temperature normalizes; monitor 60 minutes for re-ignition.
    4. Move debris to metal tray, soak-cool outside if possible, then bag as incident waste once cold.

    Documentation

    • Log incident time, location, product type, suspected cause (crush, puncture, charging, unknown), actions taken, cooling duration, and CAPA.

    5) Lead-Acid, NiCd, and NiMH Batteries

    Lead-acid (flooded/AGM/gel)

    • Keep upright on acid-resistant trays; neutralizer and absorbent within reach.
    • If leaking, neutralize and contain; move to leaker bin with absorbent; label “Hazard—Battery Acid.”
    • No mixing with Li-ion; different pallets and zones.

    NiCd/NiMH

    • Tape terminals; store in closed, non-conductive tubs.
    • Treat leaking cells as chemical exposure; bag and stage as hazardous waste.

    Outbound prep (general)

    • Use sturdy, tested packaging appropriate for battery type; cushion and segregate layers; verify labels and orientation markings; ensure counts/weights match shipment docs.

    6) CRT Devices and CRT Glass

    Risks: implosion hazards, leaded glass dust, cuts.

    Removal

    • De-energize and discharge per procedure before opening CRT devices.
    • Use hand tools; avoid impact. Remove tube intact whenever feasible.

    Handling

    • Wear cut-resistant gloves, long sleeves, and full face protection.
    • Keep tubes vertical when moving; do not stack more than one layer without custom racking.
    • If the tube breaks, do not sweep: use HEPA vac and damp wipes; collect shards in rigid containers.

    Cullet management

    • Store CRT cullet in rigid, closable drums or lined gaylords; lids closed when not loading.
    • Label with stream, date, and net weight; keep records of lot origin (device types, sources).

    Housekeeping

    • Daily floor inspection for glass; use HEPA vac only.
    • Maintain walkways free of shards; change gloves when contaminated to avoid cross-tracking.

    7) Mercury-Containing Lamps (Fluorescent, CFL, UV, HID)

    Risks: airborne mercury vapor on breakage; cuts from glass.

    Intact lamps

    • Keep in original boxes or purpose-built lamp containers; fill voids to prevent rolling.
    • Store horizontally on racks or vertically in tubes per container design; cap ends.

    Breakage response (small area)

    1. Evacuate non-essential staff; increase ventilation.
    2. Don PPE: cut-resistant gloves, eye protection; for close cleanup, add P100 respirator if your assessment requires.
    3. Gently collect large pieces; use sticky tape for small shards/powder; apply sulfur or zinc-based powder per kit instructions to bind residual mercury.
    4. Place all debris, wipes, and PPE into a sealable bag or container; label as broken mercury lamp waste.
    5. Ventilate area for ≥15 minutes before resuming normal work.

    Storage

    • Keep intact and broken streams separate.
    • Containers closed, upright, labeled with start accumulation date and contents.

    8) Storage Design, Limits, and Fire Prevention

    • Segregation map: post a color-coded floor plan showing each stream’s zone, quarantine area, exits, extinguishers, and spill kits.
    • Aisle spacing: ≥ 1 m clear aisles; no dead-end corridors; keep exits unobstructed.
    • Stacking: do not exceed manufacturer ratings for gaylords/totes; no overhang; lids on.
    • Environmental controls: cool, dry storage; avoid direct sunlight; keep batteries away from heaters and chargers.
    • Detection: smoke/heat detection in battery areas; if feasible, use thermal cameras or spot checks with IR thermometer for quarantined packs.
    • Housekeeping: daily sweep of paperwork/combustibles from battery areas; no cardboard in damaged-battery quarantine bay except as necessary for packaging.

    9) Spill, Leak, and Breakage Procedures (Quick Cards)

    Battery electrolyte (lead-acid)

    • Don chemical gloves, eye protection, apron.
    • Contain with absorbent; neutralize per kit instructions until fizzing stops.
    • Scoop into labeled container; wipe area with neutralizer solution; dispose as hazardous waste.
    • Complete Spill/Leak Log with volume estimate and corrective actions.

    Damaged Li-ion (leaking/venting)

    • Isolate, cool if hot, do not seal in airtight container until cool.
    • Double-bag debris once cold; label as incident waste; move to outside storage pending disposal.

    CRT glass

    • HEPA vac only; no brooms; collect and containerize promptly; check footwear for shards before leaving area.

    Mercury lamp

    • Follow breakage steps above; ventilate; package all cleanup materials as hazardous waste.

    10) Records & Documentation (Audit-Ready)

    Maintain simple, consistent logs. Suggested minimum set:

    • Hazardous Fractions Intake Log: date/time, source, stream, condition (intact/damaged), quantity/weight, handler initials, storage location.
    • Damaged Battery Quarantine Log: serial/model if available, condition, temperature reading (if taken), action taken, final disposition.
    • Storage Tally by Zone: running totals against your limits; include last inventory date.
    • Incident/Nonconformity Reports: what happened, immediate containment, root cause (5-Why), corrective action, verification of effectiveness, sign-off.
    • Outbound Shipping Records: counts/weights, packaging description, labels applied, carrier, destination, Bill of Lading reference.

    Retention
    Keep logs and training records per your policy; many facilities retain 3–7 years. Show the retention period on each form.


    11) Quality Checks & Continuous Improvement

    • Daily: floor walkthrough (housekeeping, closed containers, labels present).
    • Weekly: verify storage tallies vs limits; IR spot-check of quarantine bins; check extinguisher gauges and kit supplies.
    • Monthly: review incident log, close CAPAs, and update risk assessments; refresh staff toolbox talk on a recent near miss.
    • Quarterly: drill a battery thermal incident; time your response, cooling duration, and area clearance.

    Document findings and assign owners with target dates. Update this SOP when equipment, layout, or regulations change.


    12) Practical Tips That Reduce Risk Immediately

    • Terminal tape at the dock: a 5-second habit that eliminates most shorts.
    • Small, frequent shipments of damaged batteries instead of stockpiling.
    • Dedicated carts and tools for battery work—no metal bins, no mixed-use tools.
    • Photo evidence: take quick photos of damaged items and final packaged state; attach to the log entry.
    • Signage and floor markings: clear visual management beats long lectures.
    • Don’t over-engineer: simple closed containers, separation, and discipline around logs win audits.

    13) One-Page Checklists (print and post)

    Receiving/Triage—60-Second Checklist

    • Visual check for heat, swelling, leaks, or glass/mercury breakage
    • Isolate damaged items (battery quarantine or breakage protocol)
    • Apply label (stream, condition, date)
    • Tape/cap battery terminals
    • Log entry completed before moving to storage

    Daily Area Walk—5 Points

    • Containers closed, labeled, and not overfilled
    • Aisles and exits clear; no cardboard clutter near batteries
    • Storage tallies updated; limits respected
    • Extinguishers and kits present, inspected, unobstructed
    • Quarantine bin checked; temperature spot-check if needed

    Closing Note

    This SOP gives you practical, audit-ready controls for the hazardous fractions that cause the most issues in e-waste facilities: Li-ion batteries, CRT glass, and mercury lamps. Keep it simple: identify early, segregate smartly, store conservatively, document consistently, and practice your response. That’s how you reduce fires, injuries, and nonconformities—while passing audits with confidence.

  • Chain of Custody That Auditors Trust: Step-by-Step SOP with Logs and Sign-Offs

    Chain of Custody That Auditors Trust: Step-by-Step SOP with Logs and Sign-Offs

    Purpose: Define a practical, audit-ready Chain of Custody (CoC) process for electronics recycling and ITAD operations. This SOP ensures every asset and data-bearing device is tracked from intake to final disposition, with complete records, signatures, and tamper-evident controls.

    Scope: Applies to all incoming assets (loose or palletized), especially data-bearing media (HDD/SSD/NVMe, mobile devices, tapes, removable media). Covers in-house handling and transfers to downstream vendors.

    Outcomes:

    • Verifiable custody history for each asset or package.
    • Clear accountability at each handoff.
    • Evidence of data protection and compliance suitable for audits.

    1) Roles & Responsibilities

    • Receiver (Intake Technician): Creates intake record, applies asset/lot IDs, photographs condition, affixes tamper seals for data-bearing packages, initiates CoC Log entry.
    • Custodian (Operations Lead or Cage Custodian): Controls access to secure areas, verifies seal integrity at each movement, signs custody transfers, approves exceptions.
    • Transporter (Internal Driver or Courier Liaison): Verifies counts, seal numbers, and documentation before transport; obtains signatures at pickup and delivery.
    • Data Team (Sanitization/Destruction Technicians): Updates CoC Log with wipe/destroy results, serials, QA verification, and exceptions.
    • Compliance (Quality/Compliance Manager): Performs periodic reconciliation, spot audits, and record retention; maintains approved downstream list.

    Tip: Maintain a simple RACI matrix in your SOP binder to avoid confusion during audits.


    2) Definitions (keep them simple)

    • Chain of Custody (CoC): Continuous documented control of assets/media from receipt to final disposition.
    • Lot ID: Unique identifier for a group of items received together (e.g., shipment or pallet).
    • Asset ID: Unique identifier for a single device/unit.
    • Tamper-evident seal: Numbered seal that, once broken, cannot be reapplied without evidence of tampering.
    • Exception: Any deviation from expected condition, count, or procedure (e.g., broken seal, mismatch, unknown device).
    • Final Disposition: Reuse/resale, material recovery, or certified destruction.

    3) Required Records & Tools

    • CoC Log: Central record tracking lot/asset IDs, locations, handlers, timestamps, seal numbers, and signatures.
    • Intake Form: Shipper details, counts, weight, photos, condition notes, hazards.
    • Sanitization/Destruction Records: Method, tool/version, serial numbers, verification results, technician & QA sign-off.
    • Transfer Form: Handoff documentation for internal moves and outbound shipments.
    • Exception/Incident Form: Description, immediate actions, CAPA reference.
    • Secure Storage: Lockable cage or room with restricted access; access log (badge or manual).
    • Seals & Labels: Pre-numbered tamper seals; durable asset/lot labels; barcode/QR preferred.
    • Scales & Cameras: For weights and photographic evidence at intake and outbound.

    4) End-to-End Process Flow

    Step A — Pre-Receipt (Scheduling & Risk Prep)

    1. Schedule & Pre-profile: Capture client name, pickup/delivery method, expected item classes, estimated counts/weights, special requirements (encrypted media, client seals).
    2. Prepare IDs & Materials: Pre-print Lot IDs, confirm seal inventory, stage Intake Forms, and ensure secure storage capacity.
    3. Assign Staff: Receiver, Custodian, and Transporter designated for the job.

    Step B — Intake (Receiving & Lot Creation)

    1. Receive Shipment: Verify shipper identity and Bill of Lading against schedule.
    2. Initial Inspection: Check pallets/containers for damage; photograph overall shipment.
    3. Create Lot: Assign a Lot ID; affix Lot label to pallet(s)/container(s).
    4. Count & Weigh: Record total counts and/or weight per pallet/container; note discrepancies.
    5. Seal Status:
      • If shipment arrived sealed: record seal numbers & condition; photograph seals.
      • If unsealed or mixed: apply new seals to each container holding data-bearing devices.
    6. Intake Form: Document shipper, Lot ID, arrival time, receiver name and signature, condition notes, photos taken (reference numbers if you use a photo log).
    7. CoC Log Entry (Start): Create the initial CoC Log record for the Lot ID with date/time, receiver, location, and (if applicable) seal numbers.

    Tip: If you receive loose items, group data-bearing devices into bins and immediately seal those bins; record the seal numbers in the CoC Log.

    Step C — Secure Storage (Access Control)

    1. Move to Secure Area: Transport the sealed pallets/bins to the secure cage/room.
    2. Sign Handoff: Receiver → Custodian handoff recorded in the CoC Log with both signatures, date/time, and location change.
    3. Access Control: Only authorized staff may access; each entry/exit is logged (badge or manual) and tied to Lot/Asset activities.

    Step D — Internal Transfers (Within Facility)

    1. Request Move: When assets move (e.g., cage → data wipe room), generate a Transfer Form including Lot ID, destination, purpose, planned start/end times.
    2. Verify Seals: Custodian checks seal numbers and integrity before release; record in CoC Log.
    3. Signatures: Custodian (releasing) and receiving technician sign the transfer with timestamps.
    4. Upon Arrival: Receiving technician confirms counts, seal integrity, and updates the CoC Log.

    Step E — Processing (Data Protection at the Core)

    1. De-sealing & Open: Only at the point of processing. Record seal break with number, date/time, and technician signature.
    2. Identify & Label Assets:
      • Assign Asset IDs to each device/media.
      • Capture serial numbers (scan when possible).
    3. Sanitization or Destruction:
      • Record method (e.g., software wipe, degauss, shred), tool/version, settings, result (pass/fail).
      • For wipes: record verification step/results; for destruction: record particle size or cut class if applicable.
    4. QA Check: A second person (QA) verifies a sample or 100% as required; signs off with date/time.
    5. Update CoC Log: Link each Asset ID to the Lot ID, record processing details and outcomes.

    Important: If a device cannot be wiped (SMART errors, unsupported interface), quarantine it in sealed container → document exceptionroute for physical destruction → update records.

    Step F — Consolidation & Outbound (Downstream Transfers)

    1. Package for Outbound: Group processed assets by disposition (e.g., resale, material recovery). Assign Outbound Package IDs and apply tamper seals.
    2. Prepare Documentation: Outbound Transfer Form includes Lot IDs, Asset/Package IDs, counts/weights, seal numbers, destination, carrier, pickup time.
    3. Custody Transfer at Dispatch: Custodian verifies counts and seals; Transporter signs to accept custody. CoC Log updated with date/time, names, and destination.
    4. Proof of Delivery: On receipt, downstream or warehouse signs Delivery section with date/time, condition notes, and seal verification. Obtain copy (scan/photo) for records.

    Step G — Final Disposition & Closeout

    1. Record Final Disposition: For each Asset/Package ID, record resale ticket, destruction certificate reference, or material recovery ticket.
    2. Reconciliation: Compliance reviews the CoC Log against intake counts and outbound records; resolve any deltas.
    3. Close Lot: Mark Lot as “Closed” with date, reviewer name, and any CAPA references for exceptions.

    5) Exception Handling (What Auditors Look For)

    Common Exceptions & Actions:

    • Broken or Missing Seal: Immediately quarantine; photograph; assign new seal; record as exception with time, person, and location. Initiate CAPA (root cause, corrective & preventive actions).
    • Count Mismatch: Recount; reconcile against intake/outbound docs; note root cause (mis-sort, mis-scan). Update CoC Log and issue CAPA if systemic.
    • Unknown Devices/Media: Tag “Unknown,” quarantine; investigate origin (Lot linkage). If unresolved, treat as highest risk (data-bearing) and process accordingly.
    • Process Fail (Wipe Fail): Record failure reason; transfer to destruction with new sealed container; update records.

    Nonconformity Triggers: Missing signatures, absent seal numbers, handoffs without timestamps, or incomplete serial tracking for data-bearing devices. Your SOP should require immediate correction and documented CAPA.


    6) Recordkeeping & Retention

    • CoC Logs, Intake Forms, Transfer Forms, Exception/CAPA, Sanitization/Destruction Records, Proof of Delivery: Retain for the period your certification or contracts require (often 3–7 years).
    • Format: Electronic system preferred (exportable CSV/PDF). If paper, scan to PDF and index by Lot ID.
    • Indexing Rules: File by Year → Client → Lot ID, with cross-references to Asset IDs and Outbound Package IDs.

    7) Physical Controls & Security Notes

    • Segregation: Separate data-bearing from non-data-bearing at intake; different color labels help.
    • Signage: Post access rules at secure areas; include “No unauthorized entry,” “No personal devices,” and camera policies.
    • CCTV Coverage: Entrances to secure areas, processing stations, and shipping bays. Store footage per policy.
    • Tool Control: Only approved wiping tools; versions and hashes recorded in the Sanitization Record.
    • Training: Annual training on CoC, seals, exceptions, and documentation; keep rosters and quizzes.

    8) Audit-Ready Tips (Make Your Records Self-Explanatory)

    • Consistent Timestamps: Use 24-hour format with timezone; devices should be time-synced.
    • Readable Signatures: Pair signatures with printed names and employee IDs.
    • Photo Evidence: Photograph seals at intake and outbound; include the seal number visible in frame.
    • Unique IDs Everywhere: Lot ID, Asset ID, Package ID are never reused; barcode/QR reduce errors.
    • Spot-Checks: Weekly mini-audits: pick a Lot, walk from intake photo → CoC Log → sanitization record → outbound proof. Fix gaps immediately.

    9) Templates (Copy & paste into your forms system)

    A) Chain of Custody Log (Core Fields)

    • Lot ID
    • Asset ID (or “Package ID” for bulk)
    • Item description (device/media type, model)
    • Serial number (for data-bearing items)
    • Seal number(s) applied/verified
    • Location (from → to)
    • Handler name & signature (releasing)
    • Handler name & signature (receiving)
    • Date & time (handoff)
    • Purpose of transfer (intake, storage, processing, outbound)
    • Notes/Exceptions (reference Exception ID if applicable)

    B) Intake Form (Shipment)

    • Client/shipper name
    • Arrival date/time
    • Bill of Lading / reference
    • Lot ID(s) assigned
    • Counts & weights by pallet/container
    • Visual condition notes + photo references
    • Seal numbers observed (if any)
    • Receiver name & signature

    C) Transfer Form (Internal/Outbound)

    • From location → To location
    • Lot/Package/Asset IDs included
    • Count/weight
    • Seal numbers verified/applied
    • Releasing person (name, signature, timestamp)
    • Receiving person (name, signature, timestamp)
    • Carrier details (for outbound)
    • Delivery confirmation section (signature, timestamp, seal status, condition notes)

    D) Sanitization/Destruction Record

    • Asset ID, serial number
    • Method (wipe/degauss/shred), tool & version, settings
    • Result (pass/fail) + verification results
    • Technician name & signature + timestamp
    • QA reviewer name & signature + timestamp

    E) Exception/Incident Report

    • Exception ID
    • Date/time, location
    • Lot/Asset/Package ID(s)
    • Description (e.g., broken seal, count mismatch)
    • Immediate containment actions
    • Root cause analysis (once known)
    • Corrective actions taken
    • Preventive actions planned
    • Responsible person & due dates
    • Closure date & approver signature

    10) Daily/Weekly Controls (Simple Routine That Works)

    Daily:

    • Reconcile previous day’s handoffs (are signatures and timestamps complete?).
    • Verify seal stock and log usage; investigate any gaps in seal number sequences.
    • Check cage access log vs. CoC activity.

    Weekly:

    • Perform a start-to-finish trace on one closed Lot and one active Lot.
    • Calibrate scales if used for billing/weights.
    • Review exceptions—close open items or escalate CAPA.

    Monthly:

    • Audit 10% sample of sanitization records against the CoC Log and device serials.
    • Review training needs and update roster.
    • Validate that record retention and indexing are current.

    11) What Makes Auditors Confident (and Where They Fail Findings)

    Confidence Builders:

    • Every handoff has two signatures and a clear location change.
    • Seal numbers are always present, legible, and match photos.
    • Serial numbers for all data-bearing media are captured and tied to outcomes.
    • Exceptions are documented quickly with CAPA showing real preventive steps.

    Common Findings:

    • Missing timestamps or illegible signatures.
    • Seals recorded at application but not verified at receipt.
    • Wipe logs without tool version or verification step.
    • Transfer forms used inconsistently between departments.

    12) Version Control & Training

    • SOP Version: Include version number, effective date, and next review date on the first page.
    • Change Log: Brief table of revisions (what changed, who approved, date).
    • Training: New hires trained before handling assets; refresher annually; keep sign-in sheets and quiz results.

    Final Notes

    An auditor-trusted chain of custody is mostly about clarity and consistency. If a third party can understand your records without asking you questions, you’ve done it right. Keep the process simple, seal what matters, sign every handoff, record every step, and reconcile often. Your CoC will hold up—during audits and when it matters most.

  • Intake to Final Disposition: The Complete SOP for Receiving, Triage, and Asset Tracking

    Intake to Final Disposition: The Complete SOP for Receiving, Triage, and Asset Tracking

    Purpose. This standard operating procedure (SOP) defines how electronics and IT assets move from arrival at your facility to final disposition, with complete traceability, consistent quality, and audit-ready records.

    Who should use this. Warehouse leads, receiving techs, triage technicians, data-wipe teams, inventory controllers, and compliance managers.

    Outcomes. Every asset is (1) received against paperwork, (2) uniquely identified, (3) evaluated and routed, (4) tracked through each status change, and (5) closed with final disposition evidence.


    1) Scope, Roles, and Definitions

    Scope. Applies to all incoming lots: business ITAD pickups, consumer drop-offs, OEM returns, municipal programs, and internal transfers. Includes loose devices, palletized mixed e-waste, and serialized IT equipment (laptops, desktops, servers, networking, storage, mobile).

    Roles.

    • Receiving Lead: controls dock schedule, verifies documentation, signs chain-of-custody, opens lots in the inventory system.
    • Receiving Tech: pallet counts, visible damage check, tagging, quarantine flagging.
    • Triage Tech: functional grading, cosmetic grading, part-out decisions, hazard isolation.
    • Data Team: data sanitization, verification, exception handling.
    • Inventory Controller: status changes, bin moves, cycle counts, discrepancy resolution.
    • Compliance Manager: record reviews, nonconformity (NC) management, corrective actions.

    Key terms.

    • Lot/Shipment ID: unique ID for the whole intake (e.g., YYMMDD-CLIENT-###).
    • Asset ID: unique ID per unit; never reused.
    • Chain of Custody (CoC): documented control from pickup to final disposition.
    • Final Disposition: reuse/resale, parts harvesting, recycling, or approved destruction.

    2) Pre-Arrival Controls (before the truck backs in)

    1. Schedule & paperwork
      • Confirm pickup reference, client program, and special requirements (e.g., do-not-test, destroy-on-arrival, encryption notes).
      • Pre-create Lot ID with expected lines: device categories and counts.
    2. Dock readiness
      • Assign trained staff; prepare PPE for battery and CRT risk where applicable.
      • Stage quarantine area (clearly marked) for restricted or unknown materials.
    3. System prep
      • Open the Receiving Worksheet in your inventory tool with fields preloaded (client, carrier, ETA, expected pallets).

    3) Receiving Procedure (dock to check-in)

    Step 1 — Carrier handoff & CoC verification

    • Match BOL/pickup manifest with your Lot ID.
    • Record truck arrival time, seal number (if present), carrier name, and driver signature.
    • Note any seal mismatch or packaging breach as a potential NC; photograph.

    Step 2 — Pallet inspection & count

    • Count pallets; scan or tag each pallet with Pallet ID (Lot ID + “P##”).
    • Visual check for crushed corners, bulges, liquids, loose batteries.
    • If hazard suspected, move pallet to Quarantine and notify Compliance.

    Step 3 — Unload & staging

    • Move pallets to Receiving Staging. Keep aisle clear; maintain separation between lots.

    Step 4 — Initial reconciliation

    • Compare received pallet count and gross weights against paperwork.
    • Log discrepancies (over/under counts, extra categories).
    • If variance > agreed tolerance, flag Discrepancy for client approval before further processing.

    Evidence to capture (mandatory):

    • Photos: pallet faces, any damage, seal, truck plate if needed.
    • Documents: signed BOL/manifest, CoC form with Lot ID, arrival timestamps.

    4) Asset Identification & Tagging (creating traceability)

    Tagging rules.

    • One unique Asset ID per device (barcode + human-readable). Printed label goes on a clean, visible spot; avoid vents and screws.
    • Never reuse IDs. If a label is damaged, void it in the system and reprint.

    Minimum data captured at tag time.

    • Lot ID, Pallet ID, Asset ID
    • Category (laptop/desktop/server/phone/monitor/etc.)
    • Brand, Model, Part No., Serial Number (SN)
    • Presence of storage media (Yes/No/Unknown)
    • External condition (quick code A/B/C/D)
    • Power adapter included? (Y/N)
    • Data classification (client-declared if provided)
    • Photos (optional but recommended for disputes)

    Field capture sequence.

    1. Scan Lot → 2) Scan Pallet → 3) Print/scan Asset ID → 4) Enter SN → 5) Select Category/Model → 6) Media presence → 7) Save.

    Pro-tip for accuracy: Use scan validation for serials (checksum patterns where available), and force “unknown” rather than leaving blanks.


    5) Triage & Grading (deciding the best path)

    Goal. Determine if the asset is:

    • Reuse candidate (resale/remarketing)
    • Refurbish candidate (parts needed, repairable)
    • Parts harvest (remove RAM, SSD, screens, etc.)
    • Recycling (beyond economic repair or unsafe)

    Standard triage test (fast and consistent).

    1. Power test (adapters ready at benches, universal cables): powers on Y/N.
    2. POST/BIOS check: reach BIOS/UEFI? record CPU/RAM/disk presence.
    3. Screen/Display: no cracks, acceptable pixel performance.
    4. Keyboard/Ports: quick scan for missing keys/ports.
    5. Battery check (laptops/tablets): present Y/N; if swollen → Hazard and quarantine.
    6. Casing: cracks, severe dents, corrosion → downgrade.
    7. Security locks: BIOS/MDM/Activation lock; if locked → route to Exception.

    Grading codes (example).

    • A: Fully functional, minor wear.
    • B: Functional, moderate wear or minor defect.
    • C: Functional but notable defects; may need parts.
    • D: Non-functional, salvage or recycle.

    Routing logic.

    • A/B → Data Sanitization (if media present) → QCReady for Remarketing.
    • C → Refurb Bench (parts request auto-created) → retest → Data Sanitization → QC.
    • D → Harvest (target parts list pre-defined) → Commodity Recycling with weight capture.

    Required records at triage.

    • Triage result (A/B/C/D + decision)
    • Tech name and timestamp
    • Any hazards detected
    • Exception ticket (if activation-locked, missing SN, etc.)

    6) Data Sanitization Routing (if storage media present)

    Default rule. Any device with internal or attached storage goes to Media In location with a pending wipe status before any other work (unless client policy is destroy-on-arrival).

    Wipe SOP essentials.

    • Confirm Asset ID matches label and system before starting.
    • Use approved sanitization methods per media type (e.g., clear/purge/destroy equivalents) with automated verification logs.
    • For failed wipes, open an Exception and route to Physical Destruction if required.
    • Attach wipe certificate/log ID to the Asset ID record.

    Final check. No asset leaves Media area without a pass/fail record; status cannot advance to QC or Final without this field populated.


    7) Asset Tracking & Inventory Controls (no black holes)

    Location model (simple and effective).

    • ZONE > AISLE > RACK > BIN (e.g., RCV-A2-R3-B07).
    • Every status change requires a bin move in the system, enforced by barcode scan.

    Mandatory statuses.

    • Received → Tagged → Triage → Media In → Media Pass/Fail → Refurb → QC → Ready for Sale → Shipped
    • Recycling: Received → Triage D → Harvest → Weighed → Commodity Out

    Cycle counts & audits.

    • Daily: spot-check 10 random Asset IDs per active zone.
    • Weekly: cycle count of one full zone.
    • Monthly: reconcile “Ready for Sale” vs. physical bins; investigate variances.

    Discrepancy handling.

    • Open a Discrepancy Ticket when quantity, serial, or location doesn’t match.
    • Root cause categories: mis-scan, wrong bin, duplicate tag, untagged move, theft/loss.
    • Close only with corrective action (e.g., retrain, change bench layout, add second scan step).

    8) Final Disposition & Evidence (closing the loop)

    Reuse/Remarketing.

    • QC checklist complete (boot, network, keyboard, ports, camera, battery health, cosmetics).
    • Product record: specs (CPU/RAM/SSD), grade, photos, accessories.
    • Shipping record linked to Asset IDs with carrier, tracking, destination, and invoice/reference.

    Recycling.

    • Harvest log (parts removed with part ID/quantity).
    • Commodity weights by stream (e.g., mixed metal, plastics, PCBs, batteries).
    • Downstream vendor ID and transfer reference captured for traceability.

    Destruction (if applicable).

    • Destruction method, date, operator, and device count/weights.
    • Certificates/plant receipts captured against Lot ID.

    Closeout review.

    • Compliance Manager verifies a sample of records per lot (e.g., 10% or minimum of 10 assets).
    • Sign off only when all exceptions are closed and final statuses are consistent.

    9) Exception Handling (the things that break your flow—make them routine)

    Common exceptions and resolutions.

    • Activation/MDM lock: open ticket; attempt client unlock; if unresolved within SLA, route to recycle.
    • No serial number: use motherboard/IMEI or label as “No SN,” photo evidence attached.
    • Swollen battery/damage: bag/box per hazard SOP; move to battery cage; record weight and ID.
    • Mismatched paperwork: isolate affected pallets; request client correction before proceeding.
    • Wipe failure: retest; if repeat fail, physically destroy per policy.

    SLA targets (set and measure).

    • Exceptions acknowledged within 4 business hours.
    • Resolution or client update within 3 business days.
    • Monthly review of top exception types → targeted training or process tweaks.

    10) Documentation & Records (what auditors expect to see)

    Per Lot.

    • Signed BOL/manifest and CoC form
    • Arrival/departure timestamps, seal number (if used)
    • Pallet count and weight reconciliation
    • Photo set (arrival, damage, unusual items)
    • Discrepancy notes and resolutions

    Per Asset.

    • Asset ID, Lot ID, Pallet ID, Category, Brand/Model/SN
    • Triage grade and decision, technician name/time
    • Data sanitization result with log/certificate ID
    • Location history (bin moves)
    • Final disposition (sale/recycle/destroy) and evidence (invoice/COA/weight ticket)

    Retention. Keep records per your legal and client requirements (often 3–7 years). Use immutable storage or version-controlled document library.


    11) KPIs to Prove Control (and improve it)

    • Receiving accuracy: (Count matched ÷ Count received) ≥ 99.5%
    • Tagging accuracy (SN match): ≥ 99.0%
    • Cycle count variance: ≤ 0.5% by value/month
    • Media pass rate on first attempt: ≥ 97% (by device type)
    • Exception closure within SLA: ≥ 95%
    • Dock-to-triage lead time: median ≤ 2 business days

    Review KPIs weekly; if thresholds are missed, log a corrective action with root cause and owner.


    12) Templates You Can Recreate (no downloads needed)

    Receiving Checklist (printable).

    • Lot ID / Client / Date / Carrier / Seal #
    • Pallets expected / received / variance
    • Visible damage? Y/N (describe)
    • Photos taken? Y/N
    • BOL & CoC signed? Y/N
    • Discrepancies logged? Y/N
    • Receiver name & signature

    Triage Worksheet (bench view).

    • Asset ID / Category / Brand / Model / SN
    • Power Y/N, POST Y/N, Display OK, Keyboard/Ports OK
    • Battery condition (N/A/OK/Swollen)
    • Cosmetic grade A/B/C/D (notes)
    • Decision: Resale / Refurb / Harvest / Recycle
    • Tech name & time

    Asset Tag Format.

    • Code 128 barcode: ASSET-YYYY-#######
    • Human readable under barcode; include Lot ID in small print.

    Location Labeling Standard.

    • Zone sticker color by process (Receiving = grey, Media = blue, QC = green, Ready for Sale = purple).
    • Large bin IDs legible from 2 meters.

    13) Training & Competency (keep it simple but real)

    • Onboarding: shadow for two full shifts; demonstrate correct tagging and two bin moves with zero errors.
    • Quarterly refreshers: 30-minute micro-training on top exceptions (e.g., locks, swollen batteries).
    • Authorization matrix: who can change statuses, who can close exceptions, who can sign CoC.

    Maintain a training log: person, topic, trainer, date, quiz score (if used).


    14) Change Control (so the SOP stays true to reality)

    • When tools or client requirements change, update this SOP within 10 business days.
    • Version control: increment minor versions for text edits, major for flow changes.
    • Communicate changes via daily standup and post at benches; require acknowledgment in the training log.

    Final Notes

    A good intake-to-disposition SOP is about discipline and visibility. If you can answer, at any moment, “Where is this asset? What happened to it? Who touched it? What’s next?”—you’re running a controlled operation. The steps above give you that control without bloat: clear tags, short tests, mandatory scans, tight exception loops, and records that stand up to scrutiny.